Light-Weight Rotary Table Quickstart
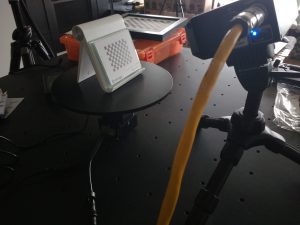
Setting Up the Hardware
- Connect the 11-pin connector to the motor chassis.
- Plug in the power (12V) for the motor via the 11-pin connector.
- Connect the USB cable for the motor into any available USB port on the host PC.
- Ensure that the rotary table is detected and functioning properly by using the Manual Control tool in Flexscan3D to change the table’s position.

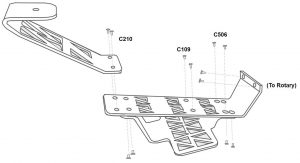
Assemble HDI Compact Rotary Mount
Calibrating the Rotary Table
Before using the Rotary Table for a full 360 scan, the rotary table must first be calibrated. In order to calibrate the rotary table, a scanner must first be connected and open in Flexscan3D. For HDI Advance, the scanner must already have been successfully calibrated without the rotary table, otherwise the option will be disabled.
- Place a calibration board on the rotary table and place the scanner at a distance from the calibration board such that it is in focus.
- Ensure that the calibration board is neither over-exposed nor under-exposed. For HDI Advance scanners, the calibration board must be the exact same size as the one used during calibration of the scanner.
- In the Project tab, select Scan mode from the top left menu.
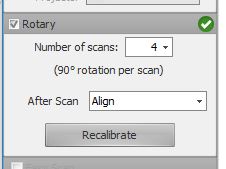
- On the left-hand menu, enable Rotary. You should then be prompted to calibrate the rotary. Click OK to begin.
- During the calibration, the rotary will rotate the calibration board as needed while the scanner saves captures of the board at different angles. When this is finished, you will be informed whether the calibration was successful or not. Click Yes to verify the calibration images.
360° Scanning
Once the rotary calibration is successful, you will be able to select the number of desired scans. More scans will result in better coverage, but setting this value too high may result in a lot of excess data, which will slow down scanning and mesh operations. We recommend doing 6 to 12 scans. You also have the option to enable/disable automatic mesh alignment.
For objects with less significant geometric features, we recommend adding modelling clay so that the alignment software has a better reference of the objects orientation on the rotary table.