


3D Scanning for Cultural Heritage What I Wish I Knew When I First Set Up My 3D Scanning Lab And What You Can Learn From It
In the first part of his series, Tom explains what you need in order to have a successful lab up and running for 3D scanning archaeological and palaeontological material.
Tom specializes in 3D imaging for cultural heritage, physical anthropology, and palaeontology.
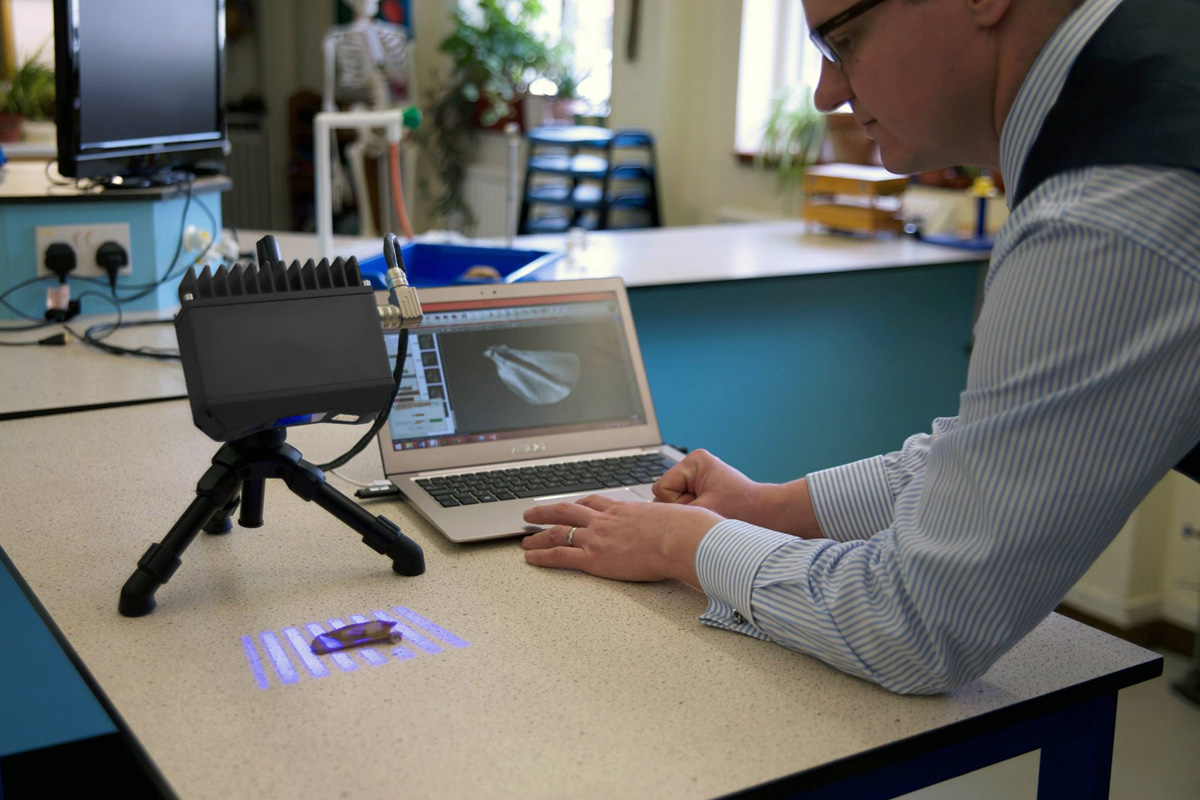
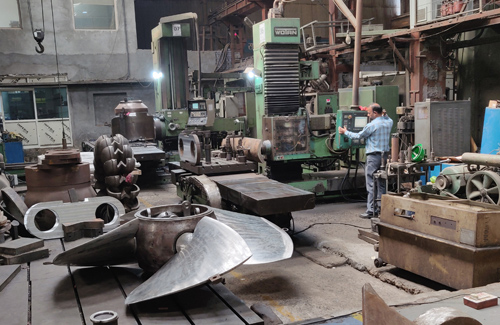
Figure 1. Tom using the HDI Compact 3D scanner in a teaching lab
My Master of Science (MSc) project back in 2009 first introduced me to the potential of 3D imaging for research and outreach. Since then, 3D scanning has been ingrained into my research.
The technology enabled me to do some of my most amazing work, from conducting the first 3D scanning and printing of a perinatal modern human fossil (Wilczyce 1), to a full body reconstruction of the iconic hominin AL288-1 or “Lucy”. I feel fortunate that my work has taken me on research trips all around Europe, and also in Africa for the open access African Fossils project.
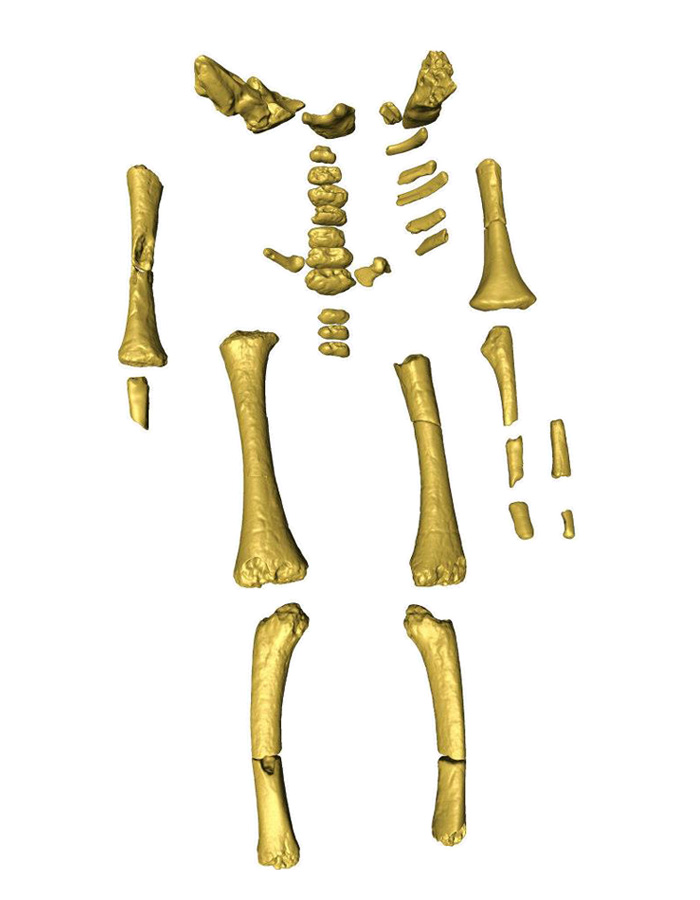
Figure 2. Wilczyce 1 – This baby fossil was very tricky to scan. View it on YouTube

Figure 3. A new reconstruction AL288-1 or ‘Lucy’. The model is available for download at figshare.
Throughout the years I’ve used a variety of 3D scanning solutions including photogrammetry, handheld 3D scanners, CT/microCT, and LIDAR, but my day to day ‘workhorses’ are the Polyga 3D scanners.
At the University of Manchester, we use our 3D scanner for a wide range of applications including:
-
Collecting scan data for morphometric analysis
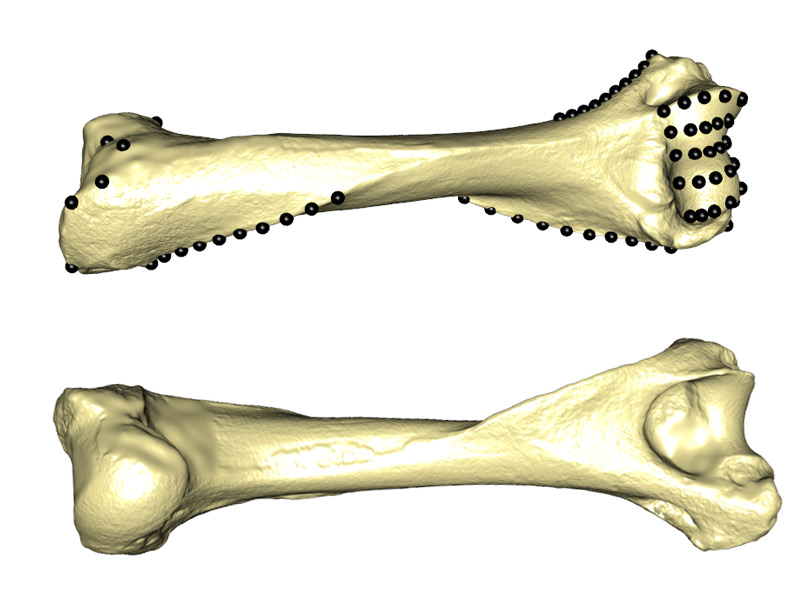
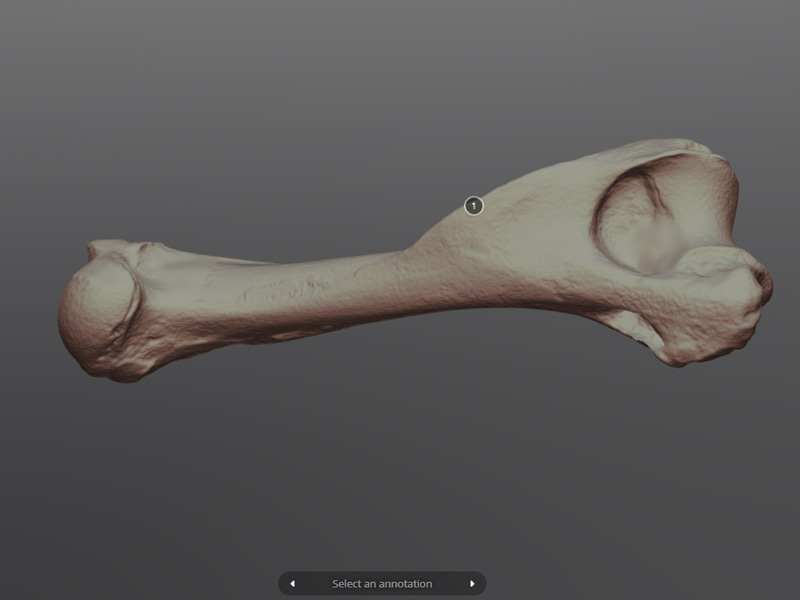
Figure 4. Meles meles (european badger) humerus digitised for geometric morphometric analysis. View it on Sketchfab.
-
Virtual skeletal reconstruction
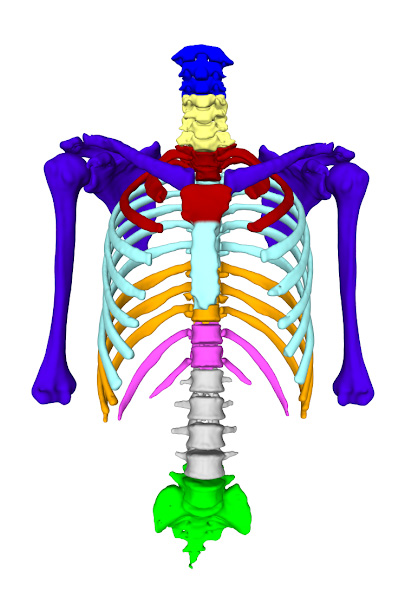
Figure 5. Reconstructing skeletons is easy with FlexScan3D scanning software.
-
Recording prior to destructive sampling
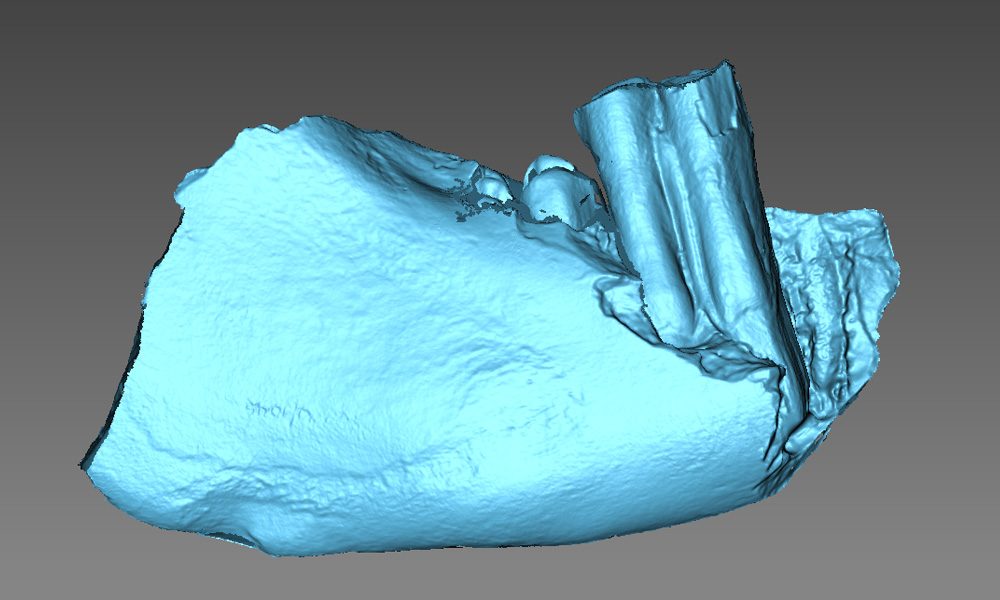
Figure 6. Part of a cattle mandible scanned prior to destructive sampling (Proteomics, DNA and stable Isotopes).
-
Making 3D scans for educational outreach and museum displays
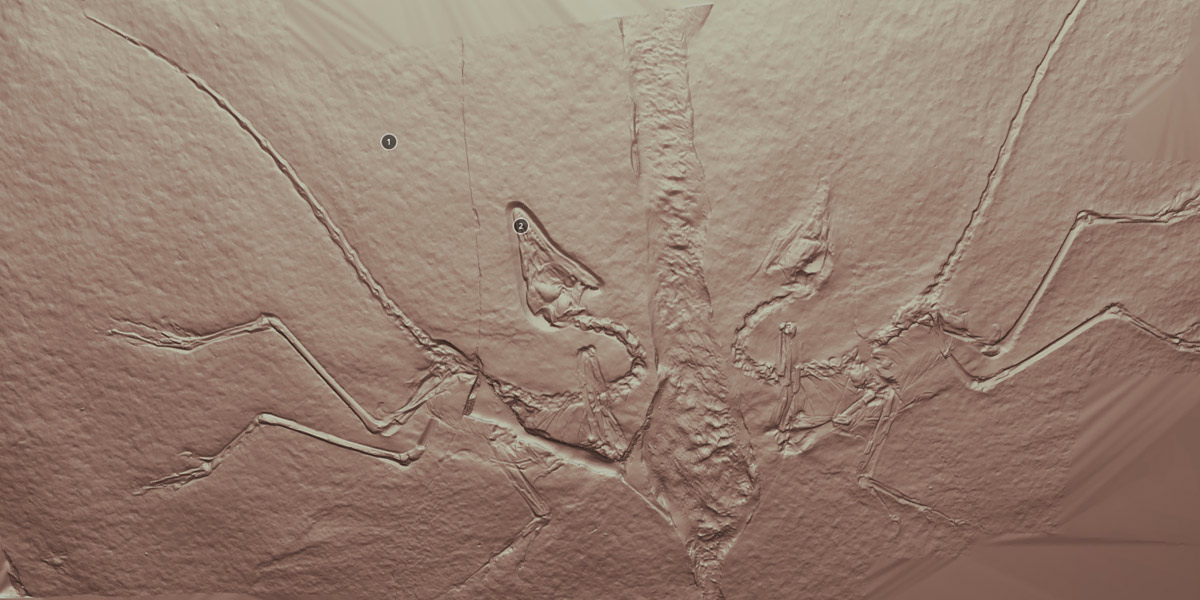
Figure 7. 3D scan of the Eichstatt Archaeopteryx. View it on Sketchfab.
-
Creating digital replicas for 3D printing
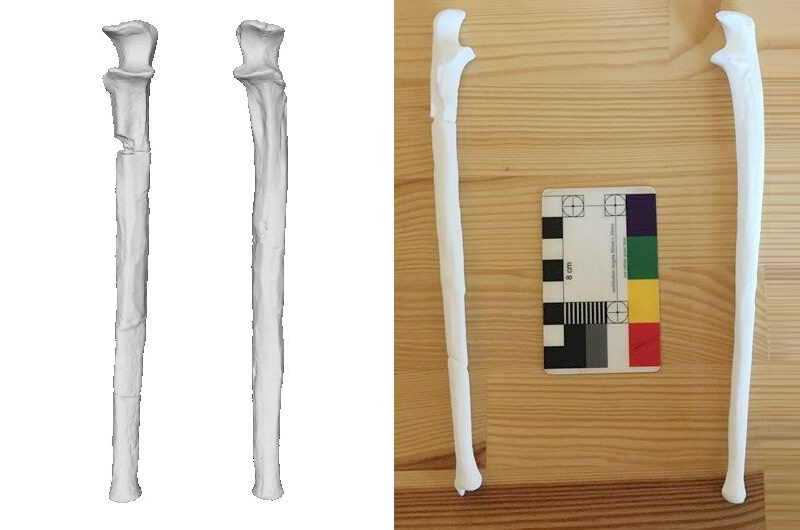
Figure 8. 3D scans and prints of sculpted reconstructions of the Ulna (forearm) of Lucy.
As the use of 3D scanning for cultural heritage is becoming more prominent in my field, I wanted to share with you what I wish I knew when I first started setting up a 3D lab for 3D imaging. This includes what a good lab setup for scanning archaeological and palaeontological material should ideally contain, as well as a few tips and tricks I’ve picked up along the way.
My hope is to help my fellow colleagues with the process of integrating 3D scanning into their work. They can reap the benefits of this technology as much as I did and become an advocate in spreading its use.
What to Consider When Setting Up a 3D Scanning Lab
- Consideration #1: Choosing a 3D Scanner
- Consideration #2: Other important hardware decision
- Consideration #3: Training
Consideration #1
Choosing a 3D scanner
When I setup my first lab at University of Sheffield, I wish I knew how long it would take to truly consider myself an expert in 3D scanning. This has been a process of several years hard work, and I am still learning things each day.
So, you’ve decided that you’re going to start digitising archaeological and palaeontological material. Either as a new user or as an upgrade to old facilities and processes, that’s great!
Choosing a 3D scanner is no easy feat. It’s important to enter into this process with open eyes as there are so many options out there. It’s easy to be distracted by the latest and greatest. However, all you need to do is to be laser focused on what exactly it is you need and you will eventually be able to find the best solution for you and your team.
One of the most important question that will guide you through this process is: What is the type of material you are going to be scanning?
If the material you are scanning are of a similar size, it may be that a plug and play 3D scanner is best suited for your needs.
This type of 3D scanner is set to scan at a fixed field of view. It doesn’t require users to calibrate or recalibrate after scans, making 3D scanning easy. With these, the scanner requires minimal setup time and you can be up and running in less than 10 minutes.
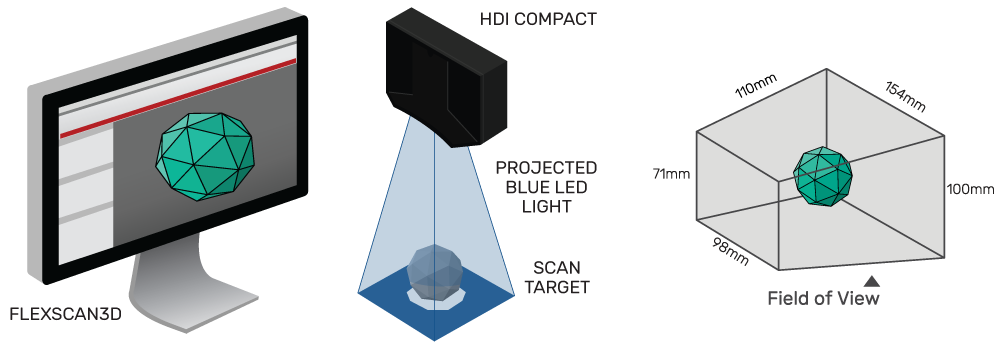
Fixed field of view scanner = one scan volume (Polyga Compact 210 model field of view shown)
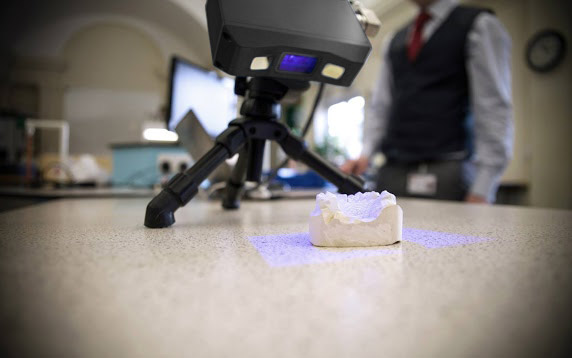
Figure 9.I specialise in high throughput 3D scanning of osteological remains from museum collections. Here I am using the HDI Compact C109 on a dental cast.
Combining one of these with a rotary turntable means that you can digitise a lot of material, quickly because most of the 3D scanning process is automated. A typical workflow from putting the object on your turntable to a finished model can be completed in less than 10 minutes as well.
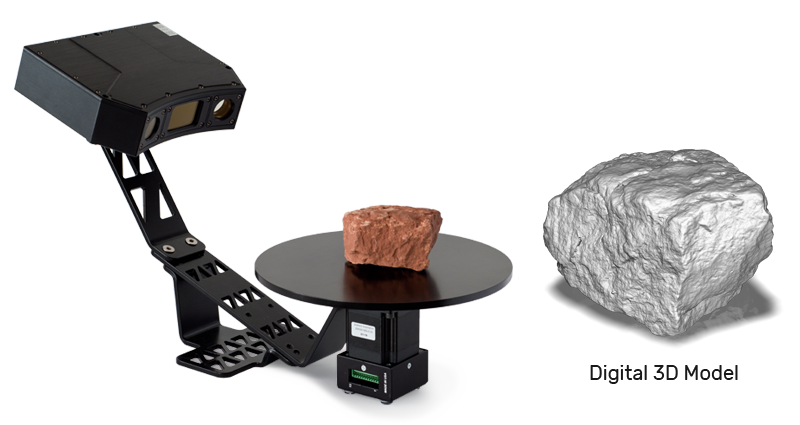
Video of how the rotary table works.
One factor to consider is that the HDI Compact doesn’t capture colour data, so they are more suited to morphological studies (I’ll talk more about colour in the next section).
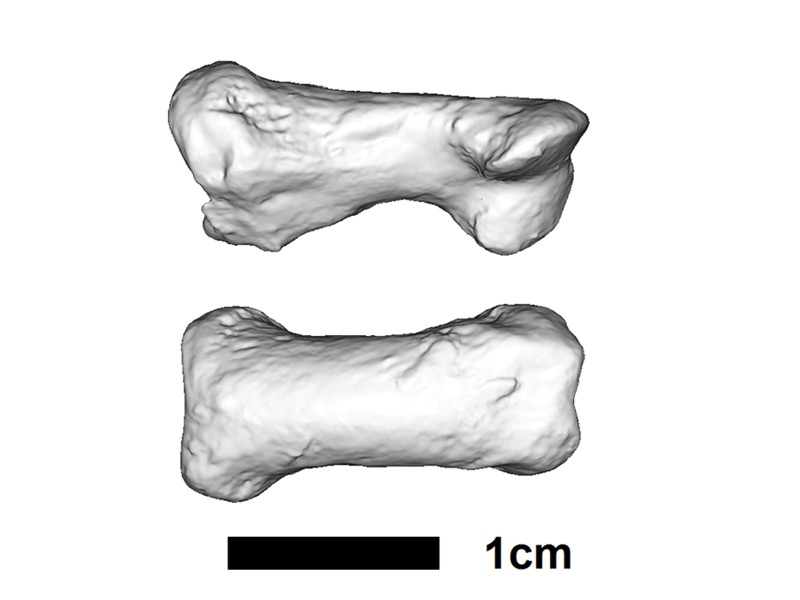
Figure 10. Papio anubis phalanx (Olive Baboon finger bone) 3D scan generated with the HDI Compact C109. View it on Sketchfab.
If you are looking to scan material that varies considerably in size, then a 3D scanner with a flexible field of view would be more suitable.
Specifically, in our lab we use the HDI Advance R3x 3D scanner for scanning large variety of size classes of materials. It has been used to scan thousands of objects ranging from small cotton bale seals to the Oxford Dodo, a complete mounted skeleton.
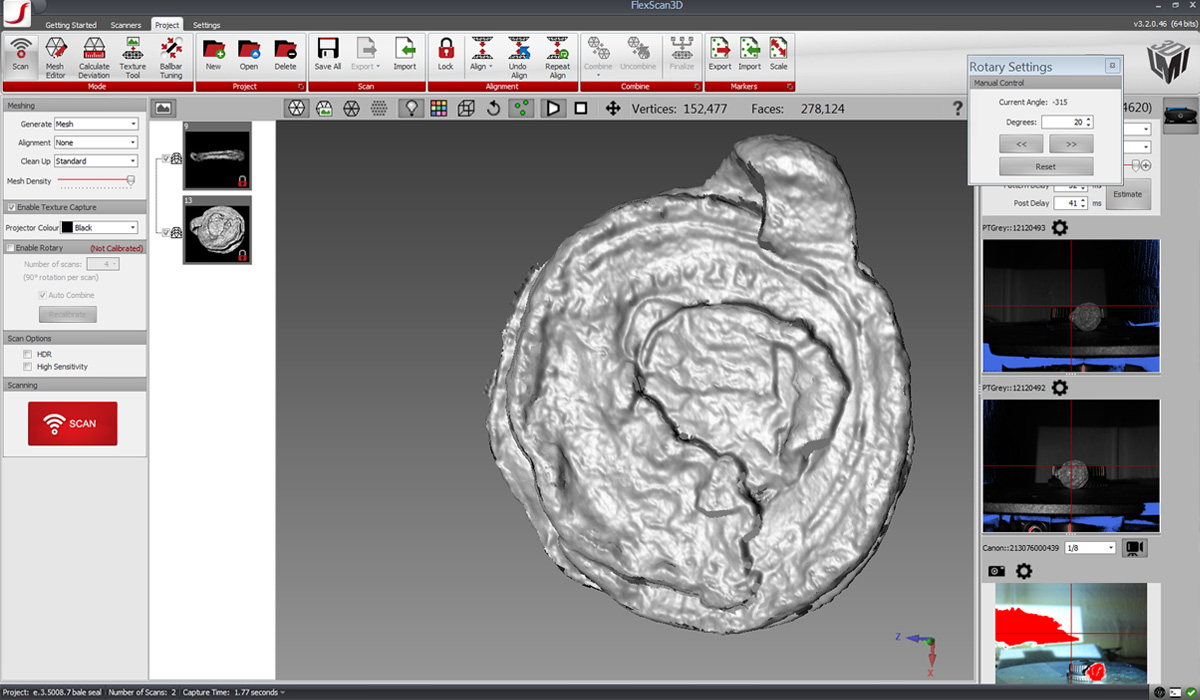
Figure 11. Cotton Bale Seal (about 5cm in diameter) 3D scan generated with the HDI Advance R3x 3D scanner. To learn more about the history: Find gives human face to Australia’s convict past
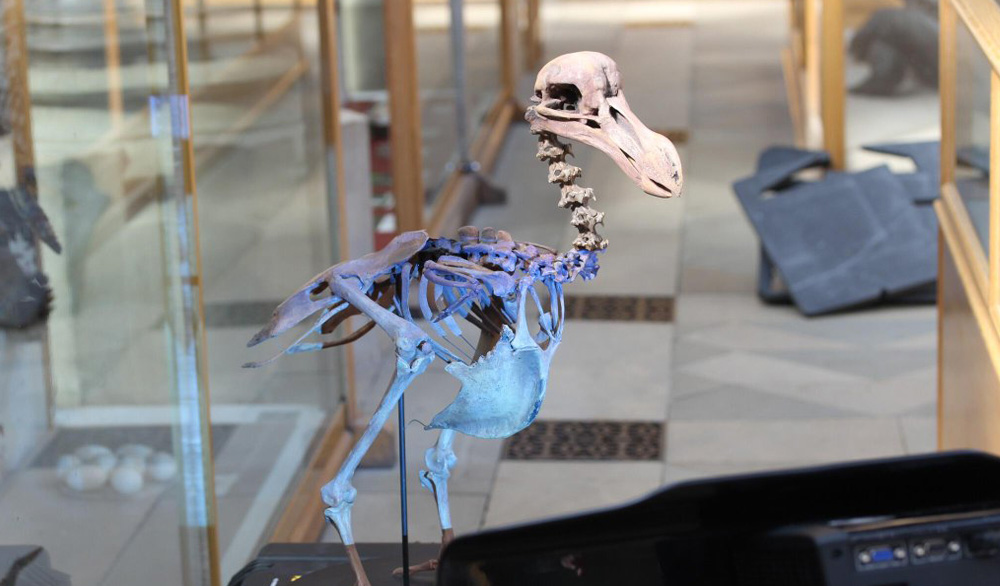
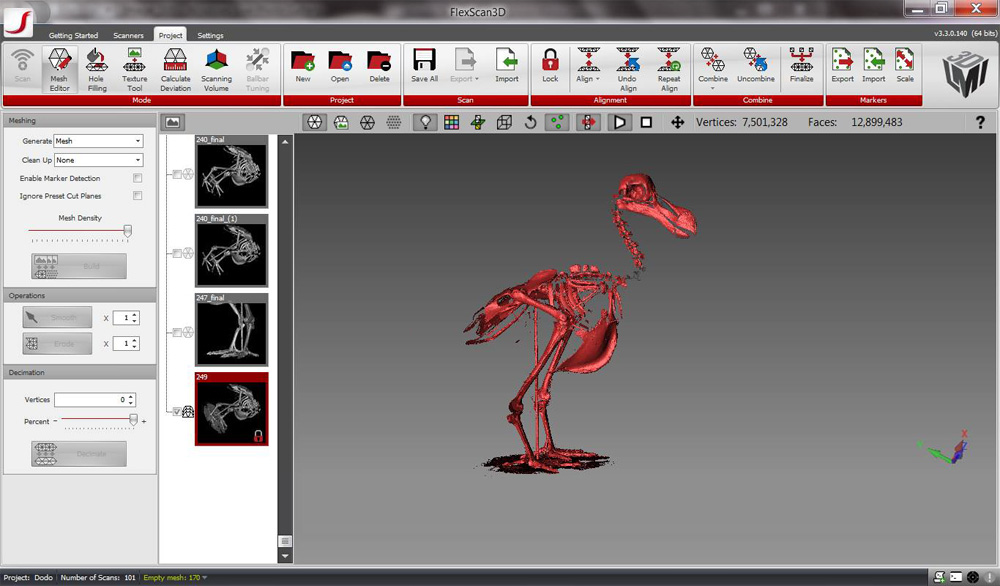
Figure 12. The Oxford Dodo. This was a very challenging thing to scan! 3D scan generated with the HDI Advance R3x 3D scanner
With this type of 3D scanner, you can change the scanning volume just by moving the camera position. All you need is to purchase one system and you would be able to scan a large range of material.

HDI Advance: Flexible field of view scanner = three scanning volumes
The Polyga Carbon is more lightweight, so easier to transport for regular off-site digitisation. But the HDI Advance series have a bigger range, in terms of its ability of digitising smaller material (such as small animal skulls) as well. Both can scan objects up to the size of a human femur, or large animal remains, with efficient workflows being easily achievable.
These type of 3D scanners can scan in colour, which is useful for several purposes. Firstly, in outreach, people respond better to colour scans. Secondly, it can be used for visual assessment of preservation (e.g. in a fossil, you can see that exposed parts are often different colours to buried ones). I scan without colour a lot of the time as I am mainly interested in morphology.
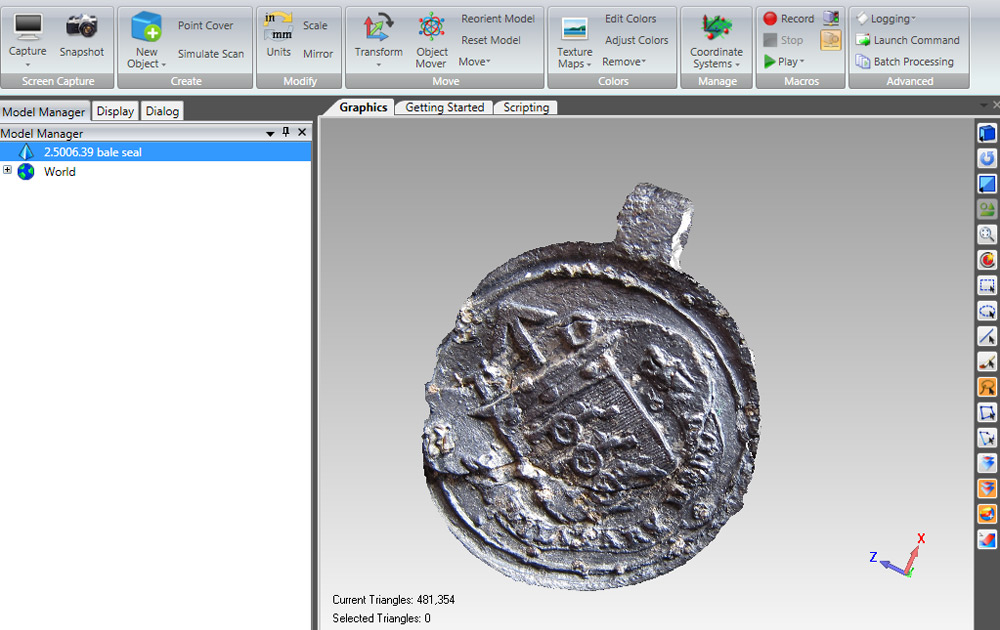
Figure 13. Bale Seal with Digital SLR camera colour texture overlay 3D scan generated with the HDI Advance R3x 3D scanner
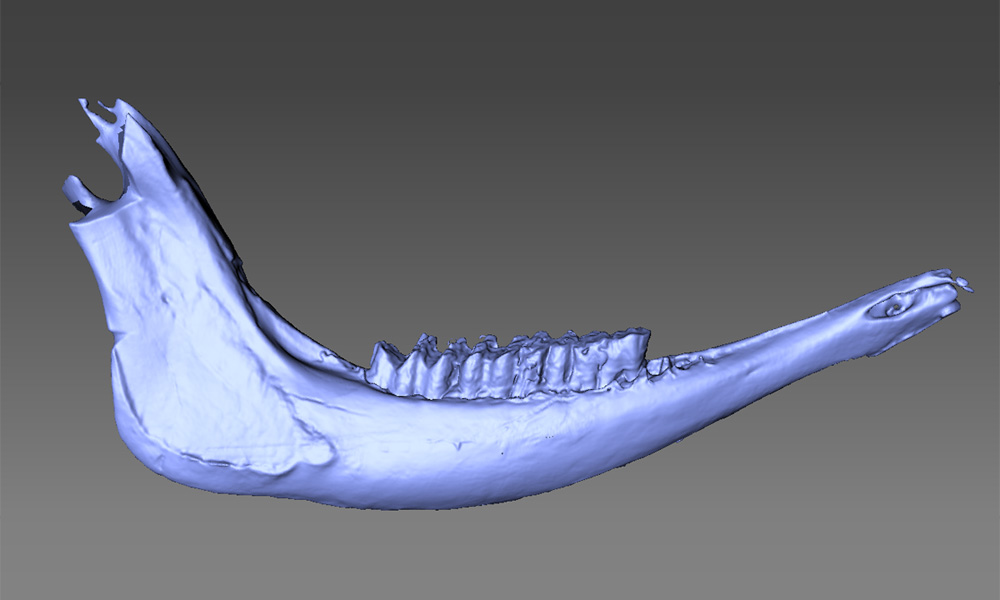
Figure 14. A Horse Mandible (26cm long) 3D scan generated with the HDI Advance R3x 3D scanner
The ability to change the field of view does require the user to calibrate the scanner on their part. This is a relatively straightforward process but does require practice.
You may also be considering a handheld 3D scanner for this purpose, but it is worth noting that data produced by stationary 3D scanners with an automated turntable tend to require less post-processing time and less manual work. It is important to evaluate your use case, and user base, carefully when making these decisions.
A Word About Calibrating a 3D Scanner
This part may not be the most exciting, but it’s an important consideration.
When selecting a 3D scanner, it is important to determine what the users would be comfortable with, and must be diligent with this part of the work as calibration affects the accuracy of the scans you capture. The calibration process is where the scanner determines its environmental conditions such as its position, rotation and behavior in relation to the scan object. You can buy a fixed, factory calibrated scanner, which will usually be calibrated according to an ISO and/or machine vision standard. If you need flexibility of several fields of view, you are going to learn to calibrate your scanner.
A good calibration is the key prerequisite for capturing accurate 3D scan data. The better you are at calibrating the scanner, the more accurate the 3D scans will be. Accuracy is important if you are using the 3D scanner for getting exact measurement of specimens, such as for morphological studies, as opposed to using the 3D scanner for 3D visualisation (educational outreach).
You also have to bear in mind that scans you generate for one purpose are often being used by others, so having good accuracy from the beginning really helps! Fortunately, calibration is a key part of the training when you buy a multi-view 3D scanner.
If you are regularly scanning very large objects, it may be that photogrammetry or a handheld scanner is the way to go.
Stationary 3D scanners like the HDI series have a photogrammetry option that enables you to scan large objects like megafauna, for example giraffe or elephant bones.
Handheld 3D scanners are handy in scanning large material. However, the scan quality can sometimes be not as high as stationary 3D scanners if that is important to your application. This is because they have to compensate for movement artefacts caused when scanning. These algorithms are very smart, but a human hand will always shake more than a stationary machine!
No one solution will work for everything so you just need to weigh the strengths with the drawbacks of each 3D scanner to determine which one will give you the most value for your lab.
So, when you have decided on which scanner you are getting, you have accomplished an important first step. Now is the time to stop and think about everything that goes with this to make your lab work successfully.
Consideration #2
Other Important Hardware Decisions
When I setup my first lab, I wish I knew that having a good workstation setup and area to run a 3D scanner is as important as deciding on which 3D scanner to buy.
You are going to need a good computer to run the scanner. This will not be a standard university issue desktop used for day-to-day tasks. It is important to talk to your IT department at this stage, as you may be tied to a framework contract at your institution, which may limit what you can purchase.
What I learned from my experience:
-
Computer Requirements
For structured light 3D scanning, a good quad core laptop or desktop with at least 16GB of RAM and discrete graphics is a necessity. Looking at ‘Workstation grade’ or ‘Gaming’ machines are generally a good place to start. Through experience, having a solid-state drive for day-to-day work really helps with the process of scanning with minimal lags.
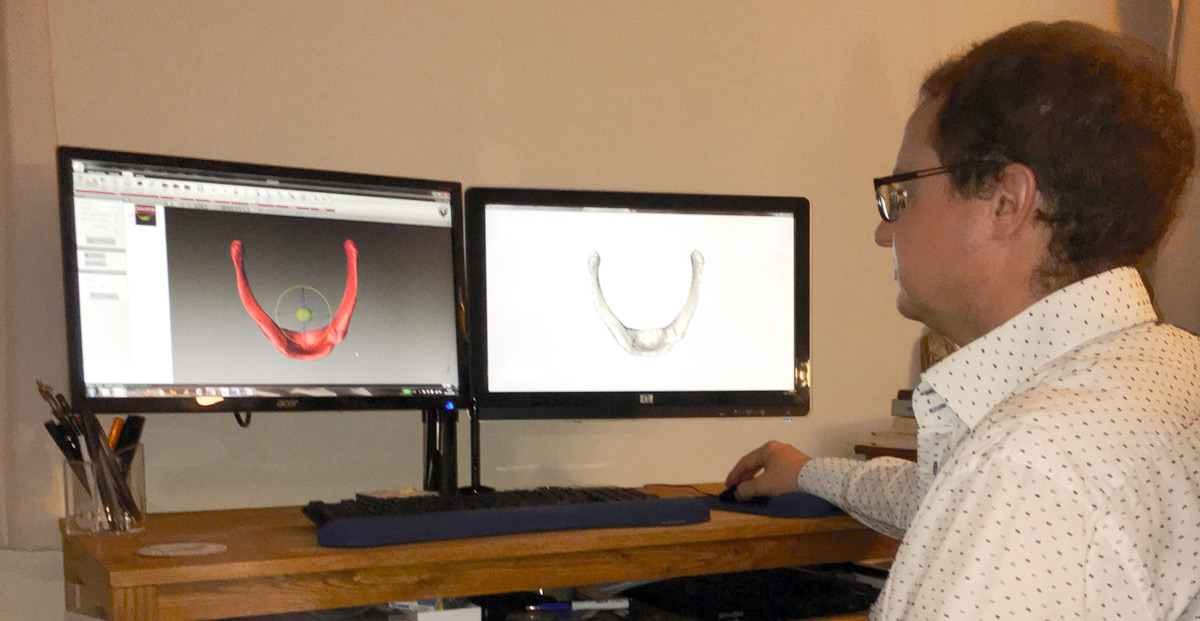
Figure 15. Working on a scan of a human hyoid for geometric morphometric analysis on a desktop computer. Scans captured from the HDI Advance R3x 3D scanner available on Sketchfab.
-
Laptop or Desktop?
If possible, both a laptop and a desktop should be purchased, along with multiple, height adjustable monitors. I recommend height adjustable monitors because you will want to have a range of people in your group using the facility. In our lab, people range from under 5 foot to over 6 foot, so it is important that people can adjust the work area to what is comfortable for them. (In fact, I have worked on more than one project where this was a factor, even in very small teams—people at both extremes of height were glad for the adjustments.) Bigger screens also make data processing easier!
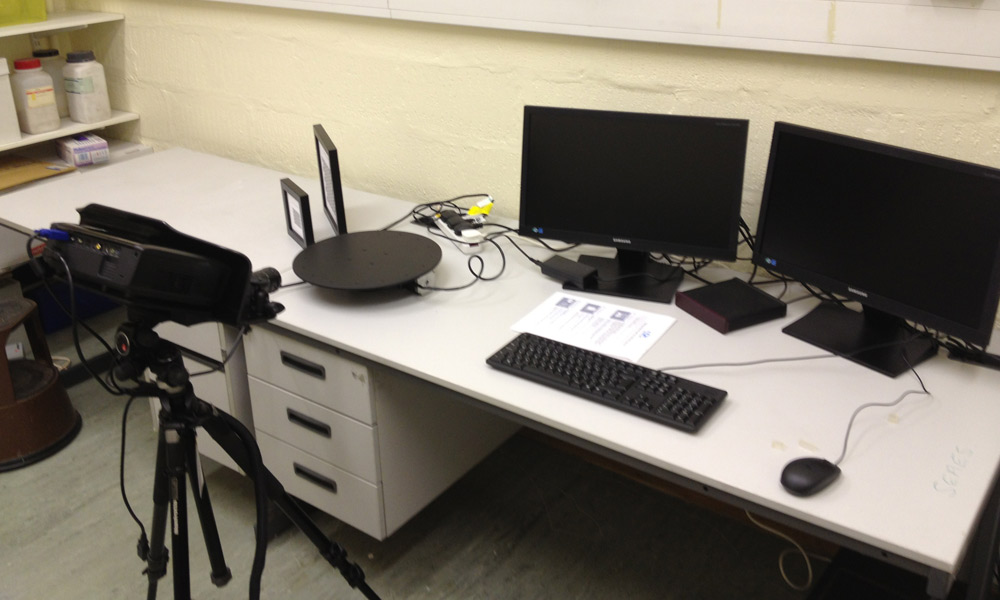

Figure 16. A couple of in-lab setups at University of Manchester
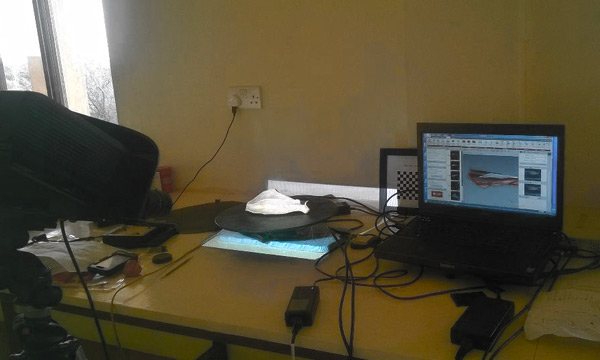
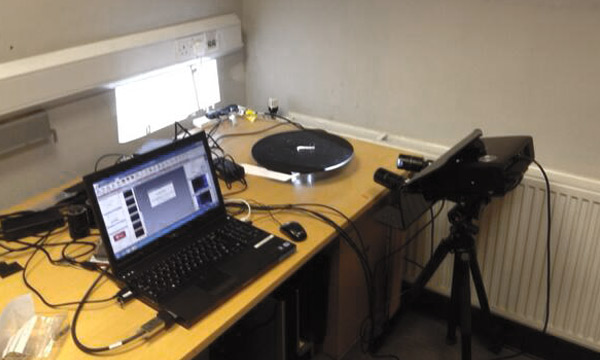
Figure 17. A couple of travelling setups, in Kenya (left) and Sheffield (right)
The desktop computer should if possible, be a higher specification than the laptop. It is likely that the machine will be used for more than just 3D scanning, (e.g. processing microCT or photogrammetry) and this will prevent user frustration. It is also easier to source high-end graphics cards and higher capacity RAM chips at a reasonable cost for desktops.
-
Consider Your User’s Needs
Support your students and staff when they make reasonable requests for things to make their life easier. For example, a supply of external hard drives and good travel cases will keep things ticking over nicely.
Each user will need at least one portable hard drive for off-site data capture. If they are away for several weeks, then more than one will probably be necessary. You will fill up a laptop in a few days of consistent scanning! A 7200RPM drive between 2 and 4TB capacity is recommended. Solid state external hard drives are coming down in price, so it is worth keeping an eye on these as well.
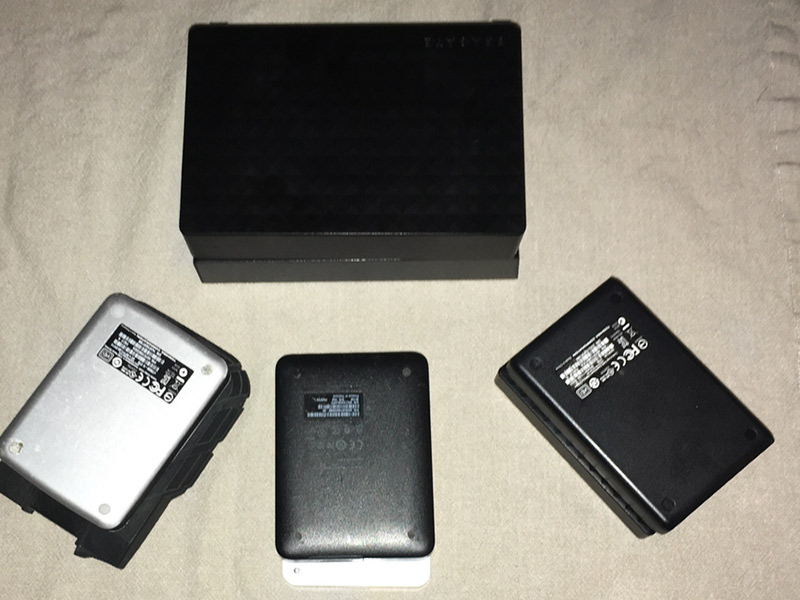
Figure 18. You’re going to need a lot of these if you have a large lab. (Hard drives from 1TB-5TB pictured)
High quality travel cases for your equipment are a must because it protects your equipment from damage during your travels. You can buy one with the 3D scanner, or you can source your own—it is up to you. Just remember that one supplied with the 3D scanner will have the foam pre-cut!
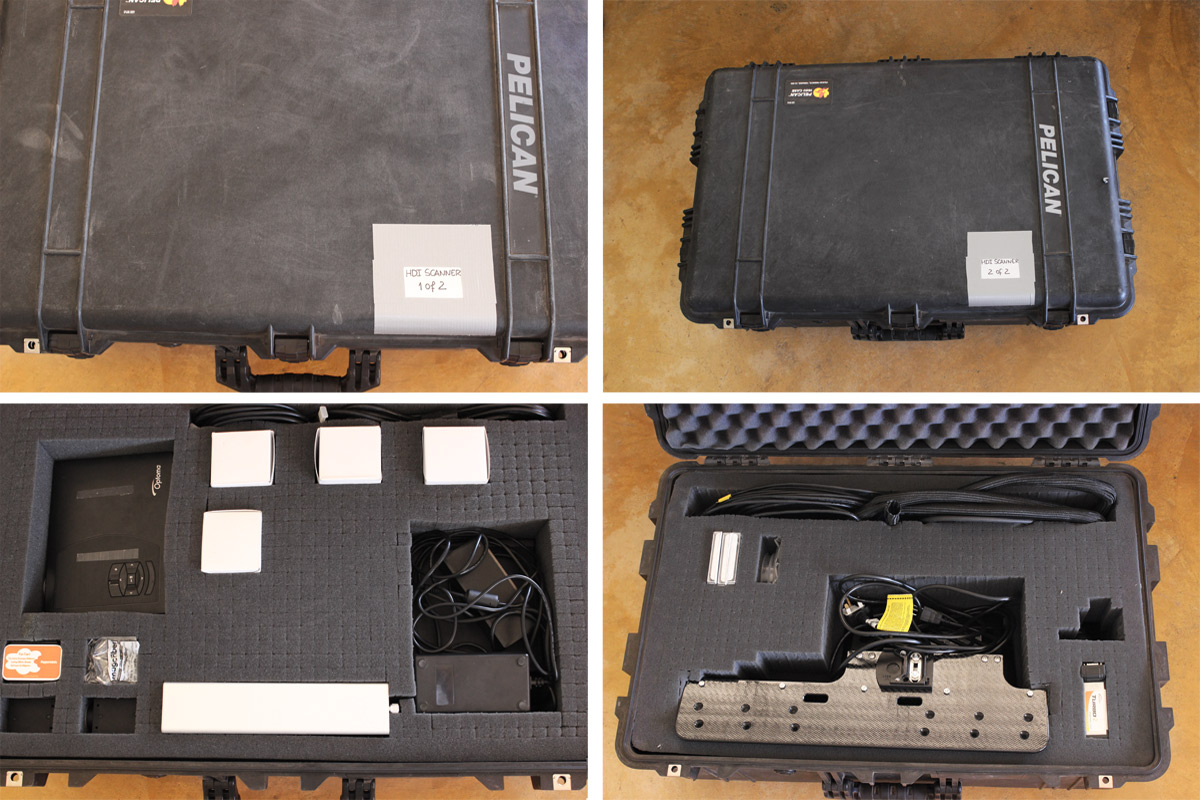
Figure 19. A pair of well-travelled Pelican cases for scanners and accessories (courtesy of the African Fossils project)
-
Long-Term Storage Solution
When I first started 3D scanning, I wish I realised how much data these projects suck up. Investing in good data backup and archiving strategies is as key as the equipment you choose!
Your lab needs to have a long-term data plan and to stick with it.
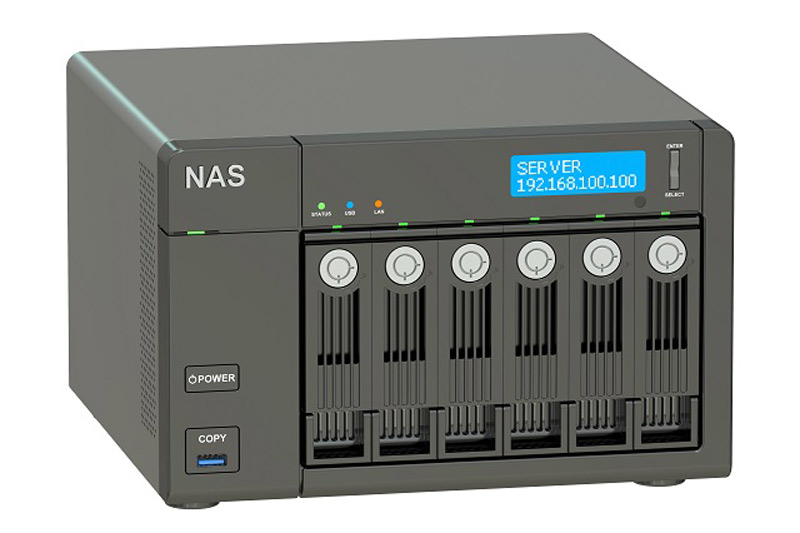
Figure 20. A NAS is a useful addition to your lab, but no replacement for a secure, centralised storage.
This is another important thing to talk to your IT service (and possibly library) department about. Some labs use Network Attached Storage. It is great for internal storage of part-processed data, especially when coupled with a high-speed internal network. This is however not a long-term solution and this means that it is another piece of equipment you have to maintain.
Your institution should have some form of large-scale networked storage solution available, but prices will vary. It may be that as a department you can get a block allocation. Bear in mind that the raw data from a typical project on the HDI Advance R3x 3D scanner will take up about 3-5GB of storage, which is pretty standard for a system that generates high accuracy and resolution 3D scans.
-
Curation Considerations and sharing Your Work
Many funders mandate a long-term data curation plan, and getting this in order early will save headaches later on. You should also talk to curators of the material that you scan, as they may have a preferred/mandated deposition policy too.
Deposition of data is something to consider early on. Something like Sketchfab is popular for display of content, but above a certain capacity, a subscription is required and this is a commercial service. Morphosource is a popular solution for deposition of morphological data, as are Open Science Framework, Zenodo, and The Archeological Data Service (ADS).
The latter charges for deposition, while the others do not. However, the ADS guarantees non-obsolescence of data, so data will be migrated to new formats as old ones become obsolete. So, if you deposit stl files and this format becomes obsolete, they will migrate your data to the accepted replacement open format. This also protects against bit rot.
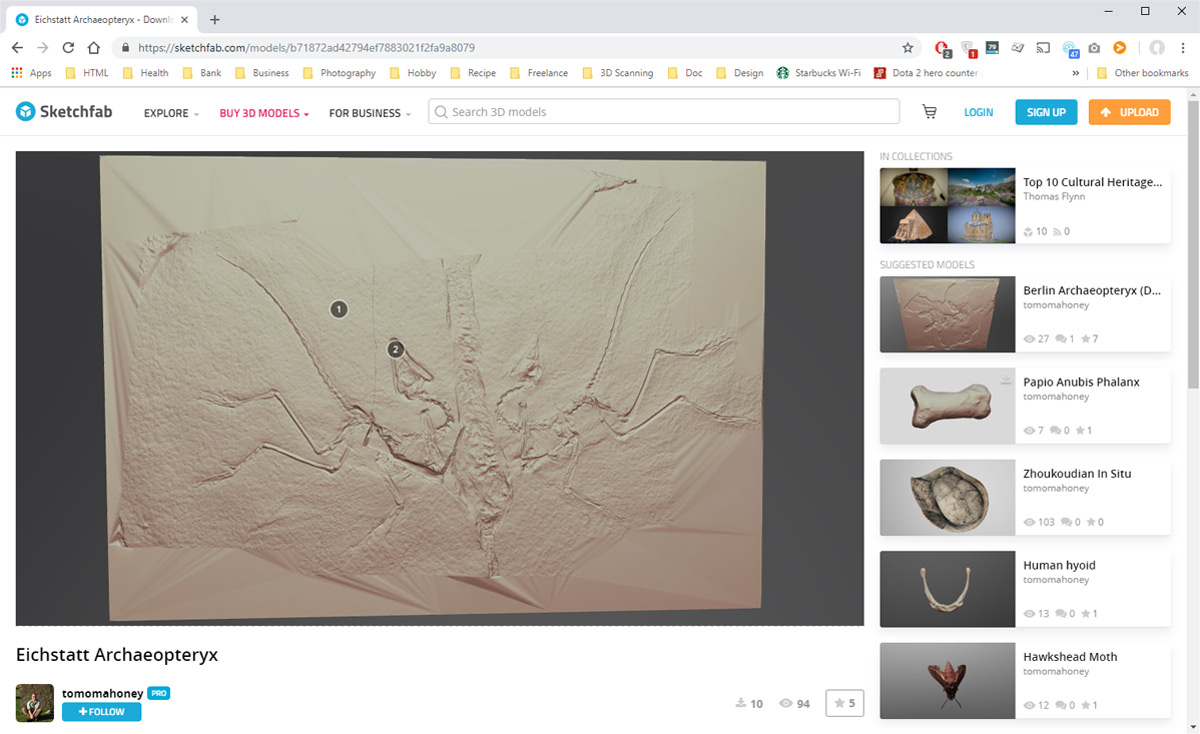
Figure 21. Berlin Archaeopteryx fossil scan on Sketchfab
Consideration #3
Training
When I setup my first lab, I wish I knew that having great equipment is half the battle. Our staff and students need to be properly trained so they can get the best quality scans while being the most productive at doing it.
So, you have decided on your 3D scanner, ordered your computers and peripherals, and set up a data plan. That’s great. A key step is to ensure that all users are thoroughly trained in the new equipment and your standard protocols. This is why it is important to have a good in-depth training session with your 3D scanner supplier like Polyga. This is usually mandatory, but highly worthwhile. Chances are that they have seen a similar use case to your lab’s, and can help get you set up well with efficient workflows.
Try to have a broad base of people using the equipment in your lab, so that you are not over-reliant on one or two members. This is often something that gets relegated to one or two graduate students or postdocs. So, when they leave, the equipment gets under-used, meaning that you will end up with less value for your investment than you thought.
By enforcing good habits from day one and setting up efficient workflows, your colleagues and the equipment you purchased will help you realise what your lab has to offer.
I hope that this will get you started on the process of getting your lab set up much more smoothly.
If you have any questions or concerns, please feel free to contact me.
All the best on your 3D scanning journey!
Best regards,

Tom O’Mahoney
School of Earth and Environmental Sciences
University of Manchester
Email: omahoney3dconsulting@gmail.com
Website: sites.google.com/site/tomomahoney

Want to see how 3D scanning can help you?
Polyga is a supplier of structured-light 3D scanners and software that takes 3D scan data to its fullest potential for use in research and commercial applications.
If you would like to speak to us regarding how to best integrate 3D scanning for archaeology and palaeontology into your work, please contact us at contact@polyga.com.